Play framework is probably the most used web framework for Scala. One can say it’s the ‘Ruby on Rails’ of Scala. And if you are developing a web application, you will need to use HTML forms sooner or later. Thankfully, the Play framework provides a couple of tools to ease the creation of those HTML elements.
As I was midway of writing this post I started to notice this was starting to get too big, so I decided to split into 2 parts: one that covers more basic usages, and another one that goes into some more advanced form customization techniques.
In this first part we are going through the basic helpers that Play provides when dealing with HTML forms, how to validate some inputs, and how does Play deals with those input errors.
On the second part we will have a look into custom bindings, nested form objects, security and CSRF, styling your forms, and some other details.
Getting started
So let’s start with the simplest case possible: a simple form, with a text field, and a numeric field and without any validations.
Just start by defining a case class that will hold your form data. We will also need to tell how to map between a form data and our new case class:
case class BasicForm(name: String, age: Int)

// this could be defined somewhere else,
// but I prefer to keep it in the companion object
object BasicForm {
  val form: Form[BasicForm] = Form(
    mapping(
      "name" -> text,
      "age" -> number
    )(BasicForm.apply)(BasicForm.unapply)
  )
}
What else do we need? We need a controller to render the page/view that will show the form to the user. In the Play framework, you should send the form of the case class you created to your view so that it can be rendered:
@Singleton
class BasicController @Inject()(cc: ControllerComponents) extends AbstractController(cc) with play.api.i18n.I18nSupport {

  def forms() = Action {  implicit request: Request[AnyContent] =>
    Ok(views.html.basicForm(BasicForm.form))
  }

}
Finally, let’s render our form!
@import helper._

@(userForm: Form[BasicForm])(implicit messages: Messages)

@main("Scala Play forms tutorial") {
    <h1>Scala Play forms tutorial</h1>

    @form(action = routes.BasicController.simpleFormPost()) {
        @inputText(userForm("name"))
        @inputText(userForm("age"))

        <input type="submit" value="Submit">
    }
}
As you can see, it’s really easy to render the form. In case you didn’t notice, we added an ‘action’ to the form. That includes creating a method on the controller to receive the input (and we also need to add to the routes file).
def simpleFormPost() = Action { implicit request =>
  val formData: BasicForm = BasicForm.form.bindFromRequest.get // Careful: BasicForm.form.bindFromRequest returns an Option
  Ok(formData.toString) // just returning the data because it's an example :)
}
# Routes
GET     /                           controllers.BasicController.index

GET     /simpleForm                 controllers.BasicController.simpleForm
POST    /simpleForm                 controllers.BasicController.simpleFormPost

# Map static resources from the /public folder to the /assets URL path
GET     /assets/*file               controllers.Assets.versioned(path="/public", file: Asset)
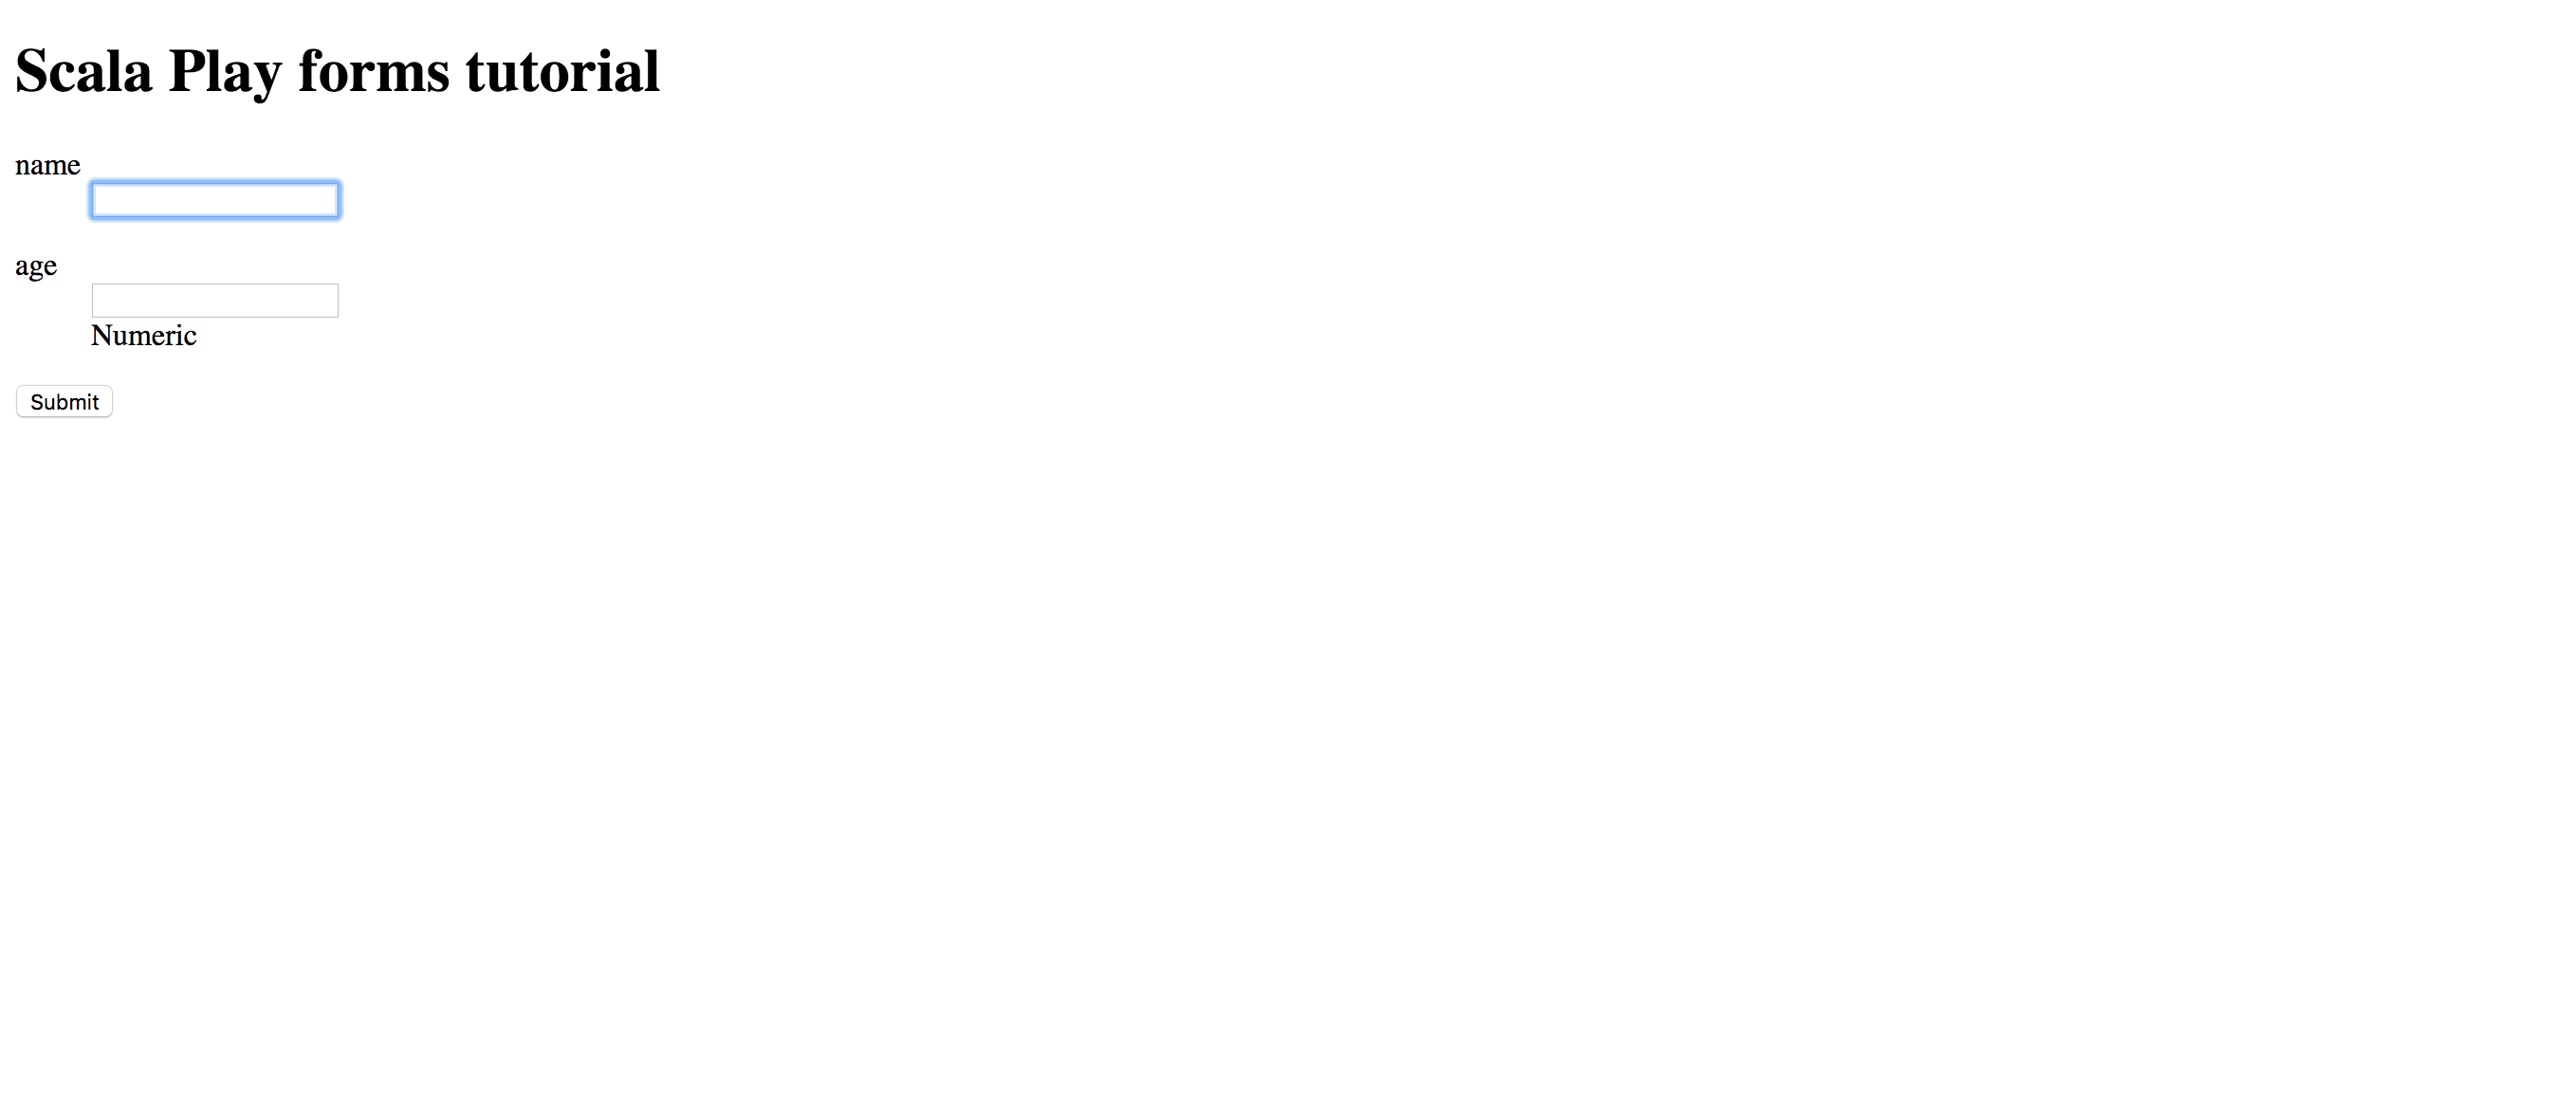
And Voila! Your first form:
Validating form data
And what happens if we send incorrect data? At this moment it’s not easy to send incorrect data because we don’t have any validation (yet). But we do have types, so maybe we can create an error intentionally, let’s try!
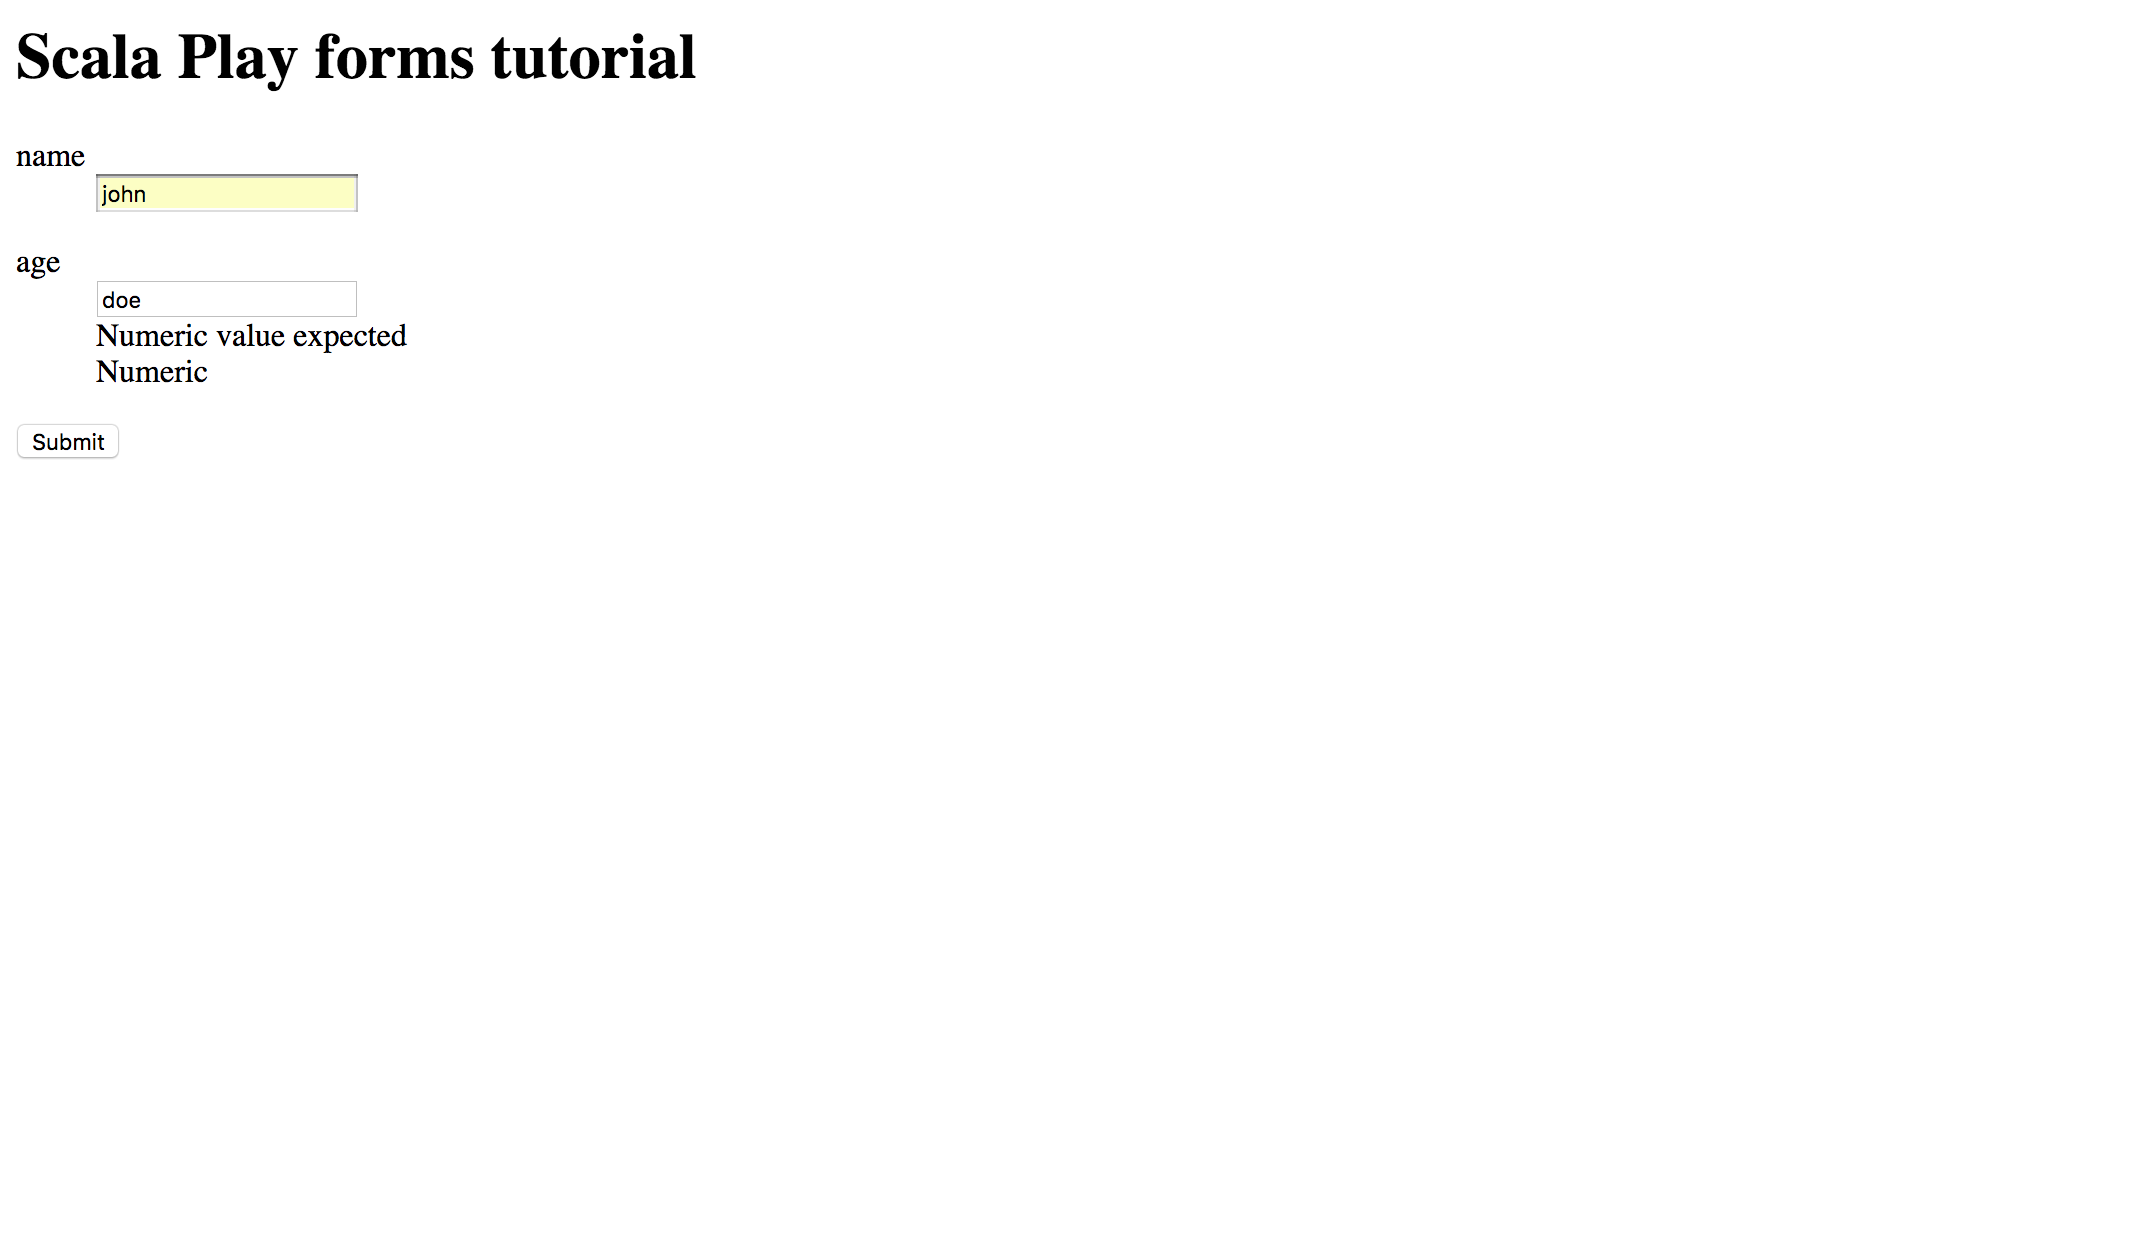
Our form has one text field and one numeric field. Let’s try to send a piece of text instead of a number and see what happens. Let’s try with name = john, and age = doe; and this is what we get:
play.api.http.HttpErrorHandlerExceptions$$anon$1: Execution exception[[NoSuchElementException: None.get]]
	at play.api.http.HttpErrorHandlerExceptions$.throwableToUsefulException(HttpErrorHandler.scala:255)
	at play.api.http.DefaultHttpErrorHandler.onServerError(HttpErrorHandler.scala:182)
	at play.core.server.AkkaHttpServer$$anonfun$$nestedInanonfun$executeHandler$1$1.applyOrElse(AkkaHttpServer.scala:251)
	at play.core.server.AkkaHttpServer$$anonfun$$nestedInanonfun$executeHandler$1$1.applyOrElse(AkkaHttpServer.scala:250)
	at scala.concurrent.Future.$anonfun$recoverWith$1(Future.scala:412)
	at scala.concurrent.impl.Promise.$anonfun$transformWith$1(Promise.scala:37)
	at scala.concurrent.impl.CallbackRunnable.run(Promise.scala:60)
	at play.api.libs.streams.Execution$trampoline$.execute(Execution.scala:70)
	at scala.concurrent.impl.CallbackRunnable.executeWithValue(Promise.scala:68)
	at scala.concurrent.impl.Promise$KeptPromise$Kept.onComplete(Promise.scala:368)
Caused by: java.util.NoSuchElementException: None.get
	at scala.None$.get(Option.scala:349)
	at scala.None$.get(Option.scala:347)
	at play.api.data.Form.get(Form.scala:228)
	at controllers.BasicController.$anonfun$simpleFormPost$1(BasicController.scala:34)
	at scala.Function1.$anonfun$andThen$1(Function1.scala:52)
	at play.api.mvc.ActionBuilderImpl.invokeBlock(Action.scala:482)
	at play.api.mvc.ActionBuilderImpl.invokeBlock(Action.scala:480)
	at play.api.mvc.ActionBuilder$$anon$2.apply(Action.scala:419)
	at play.api.mvc.Action.$anonfun$apply$2(Action.scala:96)
	at play.api.libs.streams.StrictAccumulator.$anonfun$mapFuture$4(Accumulator.scala:174)
Remember when I said to be careful on:
val userData: MyFormData = MyFormData.form.bindFromRequest.get
So here’s what happened:
- When we do
BasicForm.form.bindFromRequestwe get aplay.api.data.Form[T]. - A
Form[T]is defined as:
case class Form[T](mapping: Mapping[T], data: Map[String, String], errors: Seq[FormError], value: Option[T]) {
  // many things

  def get: T = value.get

  // many other things
}
And now you see why our method throws an exception. If you inspect (using a debugger or a simple println statement) you can see that there’s an error message about age not being a number, stored in errors.
So…how should we safely deal with forms? You can use the Form.fold method:
def simpleFormPost() = Action { implicit request =>
  BasicForm.form.bindFromRequest.fold(
    formWithErrors => {
      BadRequest(formWithErrors.errors.toString)
    },
    formData => {
      Ok(formData.toString)
    }
  )
}
And now we’ll get:
List(FormError(age,List(error.number),List()))
But this is really ugly. Is there any better way? Of course you can add any custom behaviour after you find out the errors. But Play provides something out of the box too. Just try to call the view again, this time with the form with errors.
def simpleFormPost() = Action { implicit request =>
  BasicForm.form.bindFromRequest.fold(
    formWithErrors => {
      // binding failure, you retrieve the form containing errors:
      BadRequest(views.html.basicForm(formWithErrors))
    },
    formData => {
      Ok(formData.toString)
    }
  )
}
And you will see that the form was rendered and it displays the errors (of course the presentation isn’t the best, but nothing that a little of css magic can’t solve!).
Send filled forms
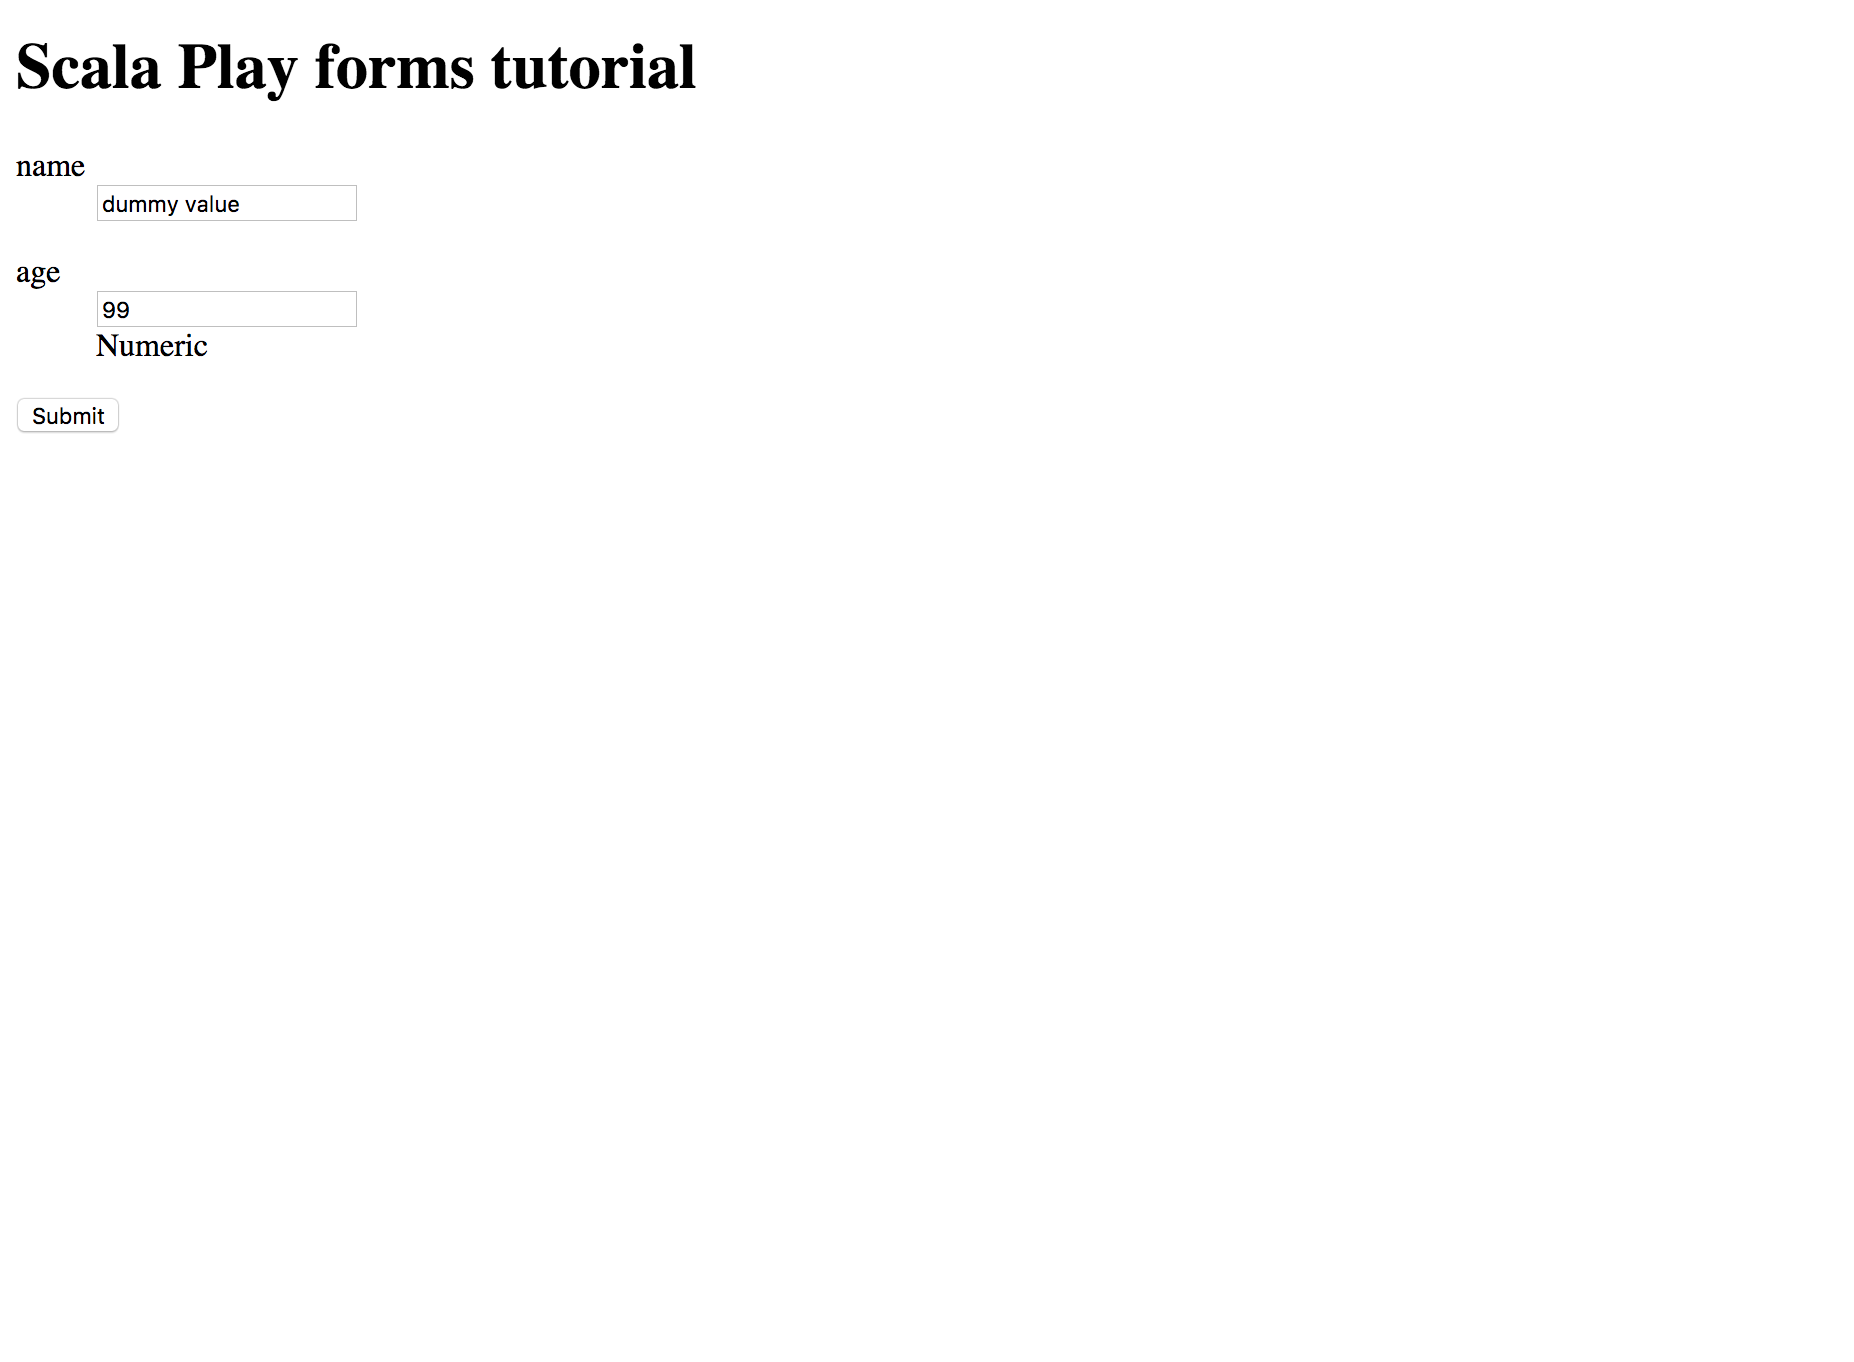
But what about those times you want to provide a form already filled so that the user can update some data? You need to send a pre-filled form, and that’s really easy actually since forms have a .fill method:
def filledForm() = Action { implicit request =>
  Ok(views.html.basicForm(BasicForm.form.fill(BasicForm("dummy value", 99))))
 }
Constraints
If you have been trying this yourself you may have noticed it is possible to send empty values in our forms. If you don’t type anything into the name field, the form will consider as an empty string, and accept the submission. But that’s not what we want most of the times (note that you can’t do that with a numeric field, a value needs to be specified).
Of course we can implement the logic on the server side ourselves, but maybe there’s some easier way using Play native helper methods?

Play provides a bunch of utilities to help you add constraints into your forms:
- text
- nonEmptyText
- text with min and max length
- number with min and max value
- boolean
- date (java.util.Date)
- optional
- list
- and many others you won’t need probably
Let’s try some of them! Let’s start by creating a new form and its form mapping:
case class ConstrainedForm(name: String, nickname: String, age: Int, email: String, date: java.util.Date, opt: Option[String], employed: Boolean, lst: List[String])

object ConstrainedForm {
  val form: Form[ConstrainedForm] = Form(
    mapping(
      "name" -> nonEmptyText,
      "nickname" -> text(minLength = 4, maxLength = 6),
      "age" -> number(min = 18, max = 35),
      "email" -> email,
      "date" -> date,
      "opt" -> optional(text),
      "employed" -> boolean,
      "lst" -> list(text)
    )(ConstrainedForm.apply)(ConstrainedForm.unapply)
  )
}
and to render use:
@import helper._

@(userForm: Form[ConstrainedForm])(implicit messages: Messages)

@main("Scala Play forms tutorial") {
    <h1>Scala Play forms tutorial</h1>

    @form(action = routes.BasicController.complexFormPost()) {
        @inputText(userForm("name"))
        @inputText(userForm("nickname"))
        @inputText(userForm("age"))
        @inputText(userForm("email"))
        @inputText(userForm("date"))
        @inputText(userForm("opt"))
        @inputText(userForm("employed"))
        @repeat(userForm("lst"), min = 3) { emailField =>
            @inputText(emailField)
        }

        <input type="submit" value="Submit">
    }
}
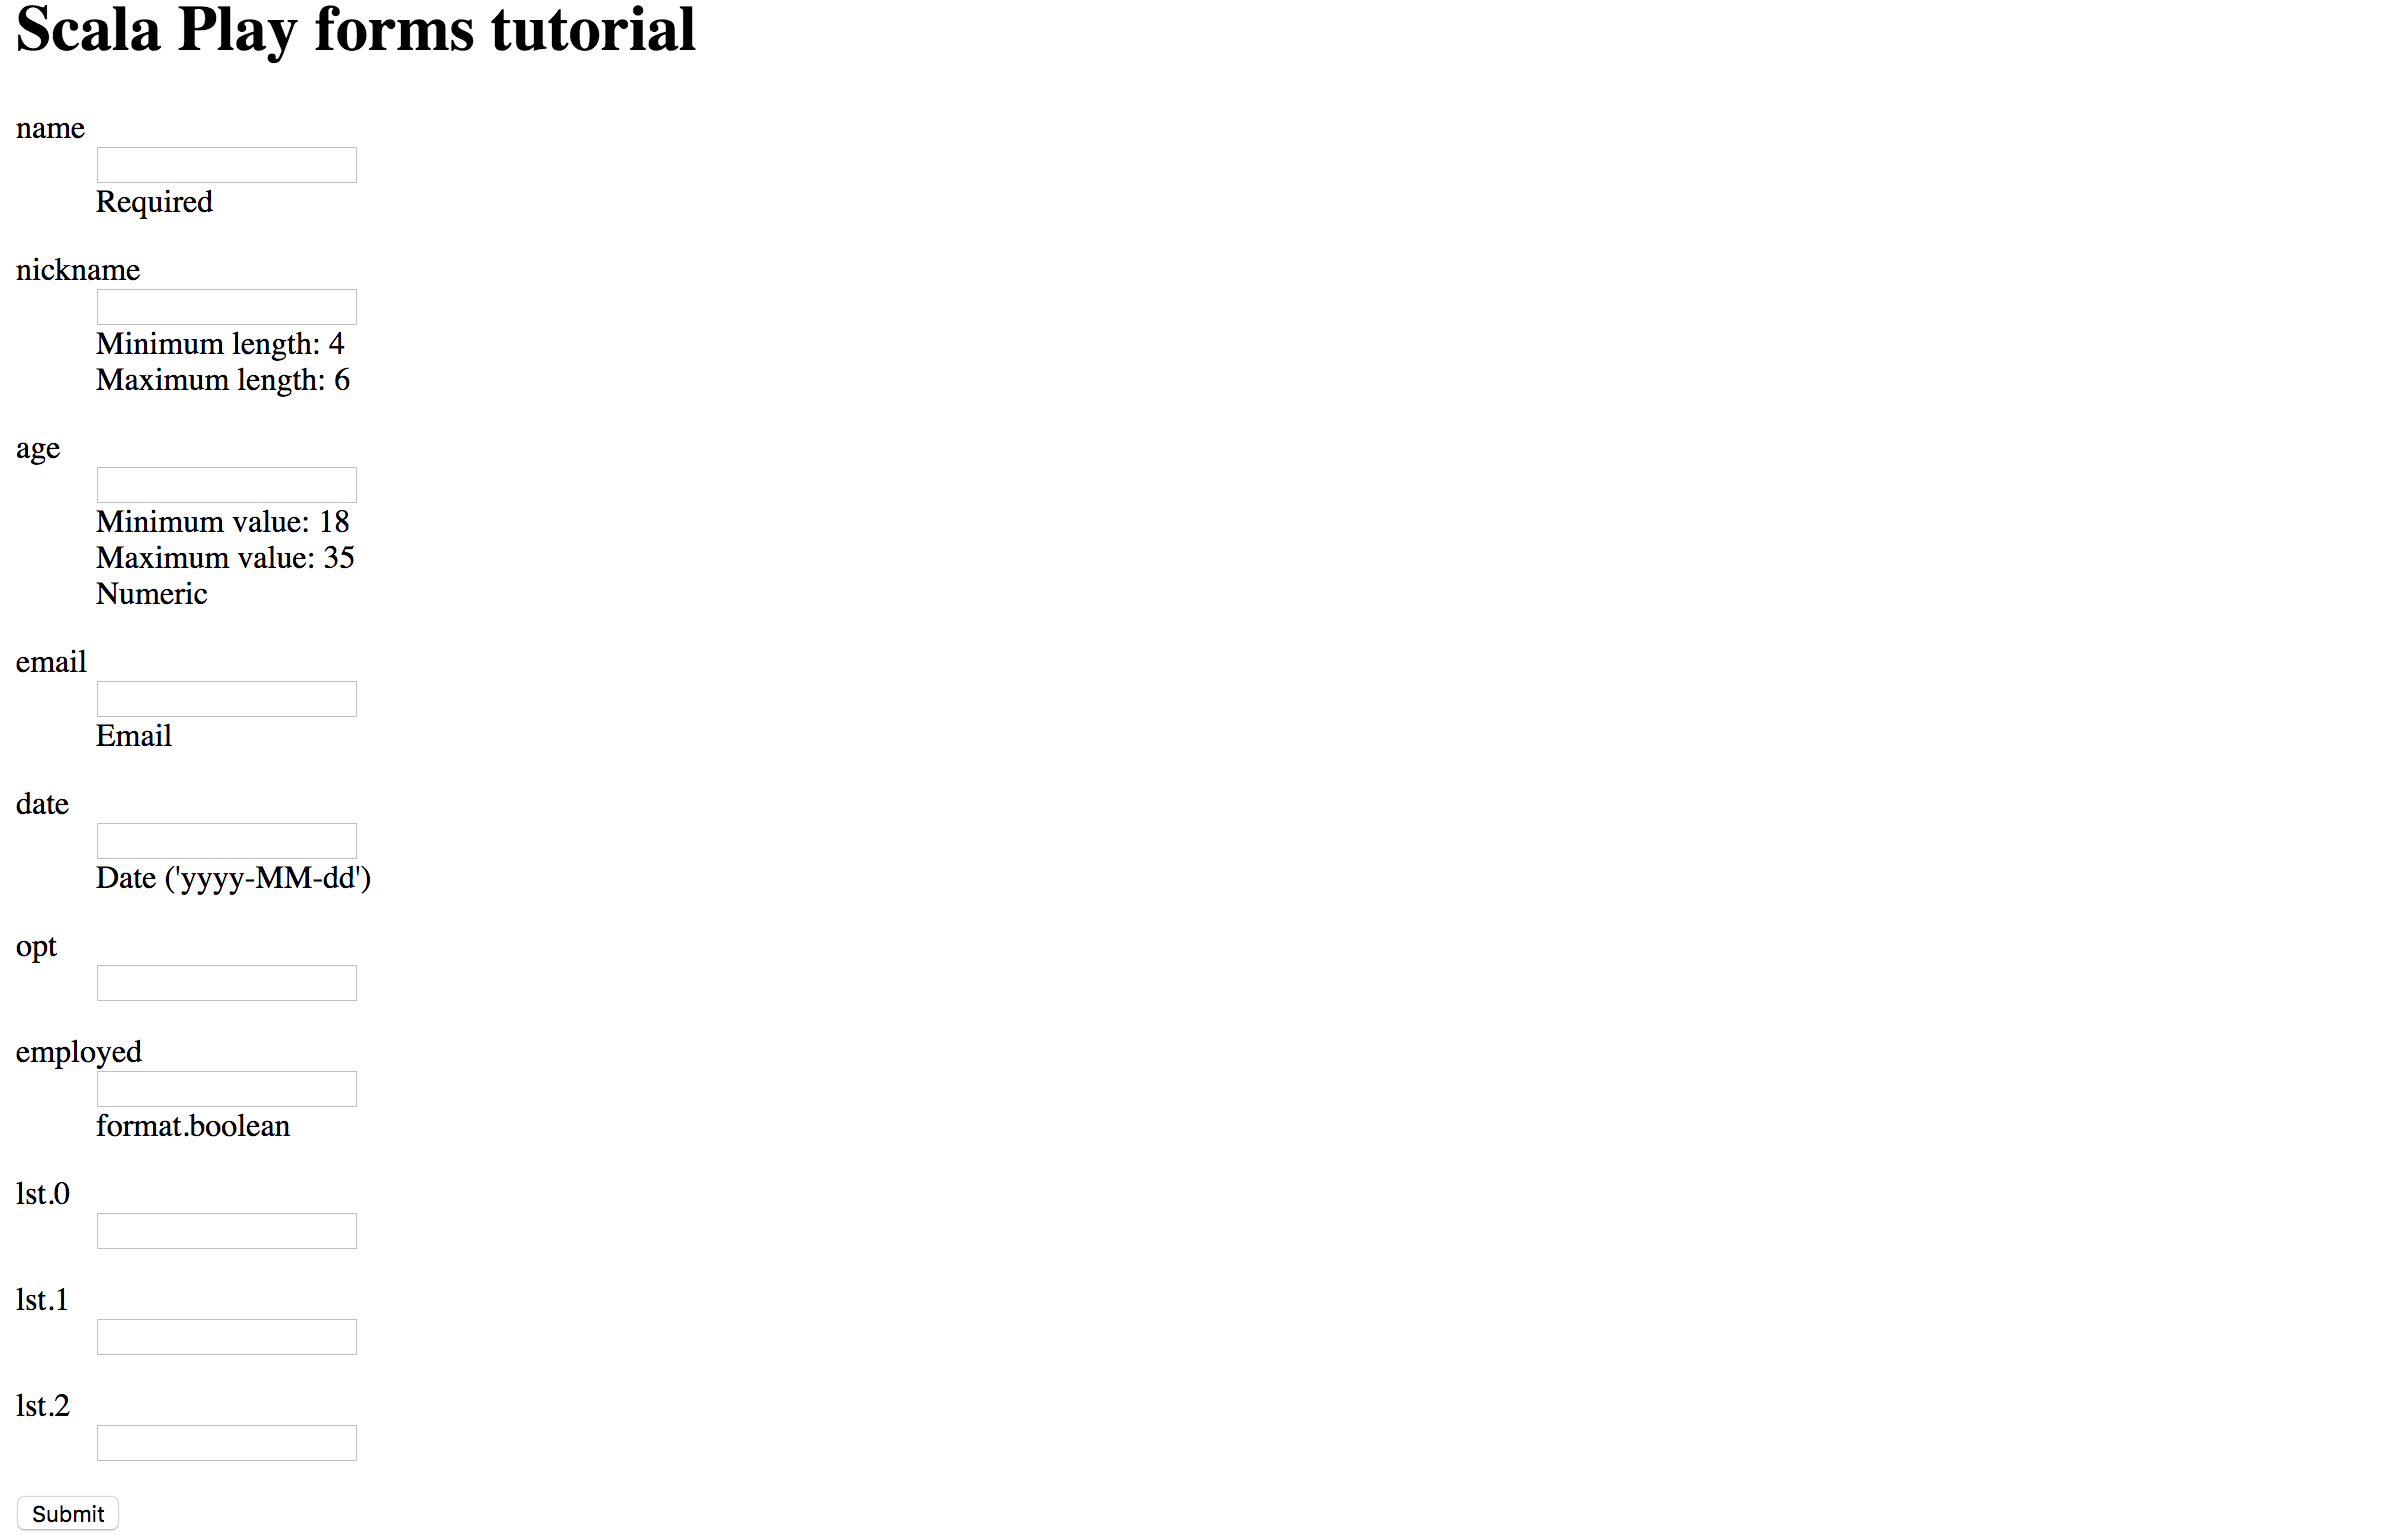
As you can see:
- the name is defined as non empty text
- the nickname has a length between 4 and 6
- the age must be a number between 18 and 35
- the email field is defined as an email
- we also define a date input field
- an optional field is declared opt
- employed as a boolean
- and finally we add several (3) form fields under the same form value: lst
Once again, the result isn’t very beautiful, but it works:
Remember you can always avoid using the Play form helpers and use plain HTML which allows you to turn the form a little more pretty. You can do it using something like this:
@helper.form(routes.BasicController.simpleFormPost()) {
  <input type="text" id="@{form("name").id}" name="@{form("name").label}" value="@{form("name").value}">
  <input type="text" id="@{form("age").id}" name="@{form("age").label}" value="@{form("age").value}">
  <button type="submit">Submit</button>
}
And if all of this is not enough and you find yourself needing a custom validation, Play also allows to add a new custom validation.
Sick of input text
You must be wondering ‘but why am I using input text for booleans, dates, and everything else when HTML forms support much more types than that?’. Well, we have been using input texts because it’s easier to start with. Now it’s time to have a look at the other input types.
As you probably know, there are many other input types. While at this moment there is no built-in support for some input types, Play offers a nice set of built-in helpers that should work for almost every need you face:
- text (through
inputText- that we have been using until now) - password (through
inputPassword) - date (through
inputDate) - file (through
inputFile) - radio (through
inputRadioGroup) - select (through
select) - textarea (through
textarea) - checkbox (through
checkbox)
Most of the input times are very straightforward to use, but let’s have a look on how to use all of them:
As always, we will start by defining a case class and the corresponding form to hold the data:
case class InputTypesForm(name: String, password: String, description: String, rich: Boolean, date: java.util.Date, favColor: String, leastFavColor: String)

object InputTypesForm {

  object Preferences extends Enumeration {
    val Red, Green, Blue = Value
  }

  val form: Form[InputTypesForm] = Form(
    mapping(
      "name" -> nonEmptyText,
      "password" -> nonEmptyText(minLength = 6),
      "description" -> nonEmptyText,
      "rich" -> boolean,
      "date" -> date,
      "favColor" -> nonEmptyText,
      "leastFavColor" -> nonEmptyText,
    )(InputTypesForm.apply)(InputTypesForm.unapply)
  )
}
You probably noticed we defined a Preferences Enumeration. It will be useful to the select box we will test. So far there’s nothing special.
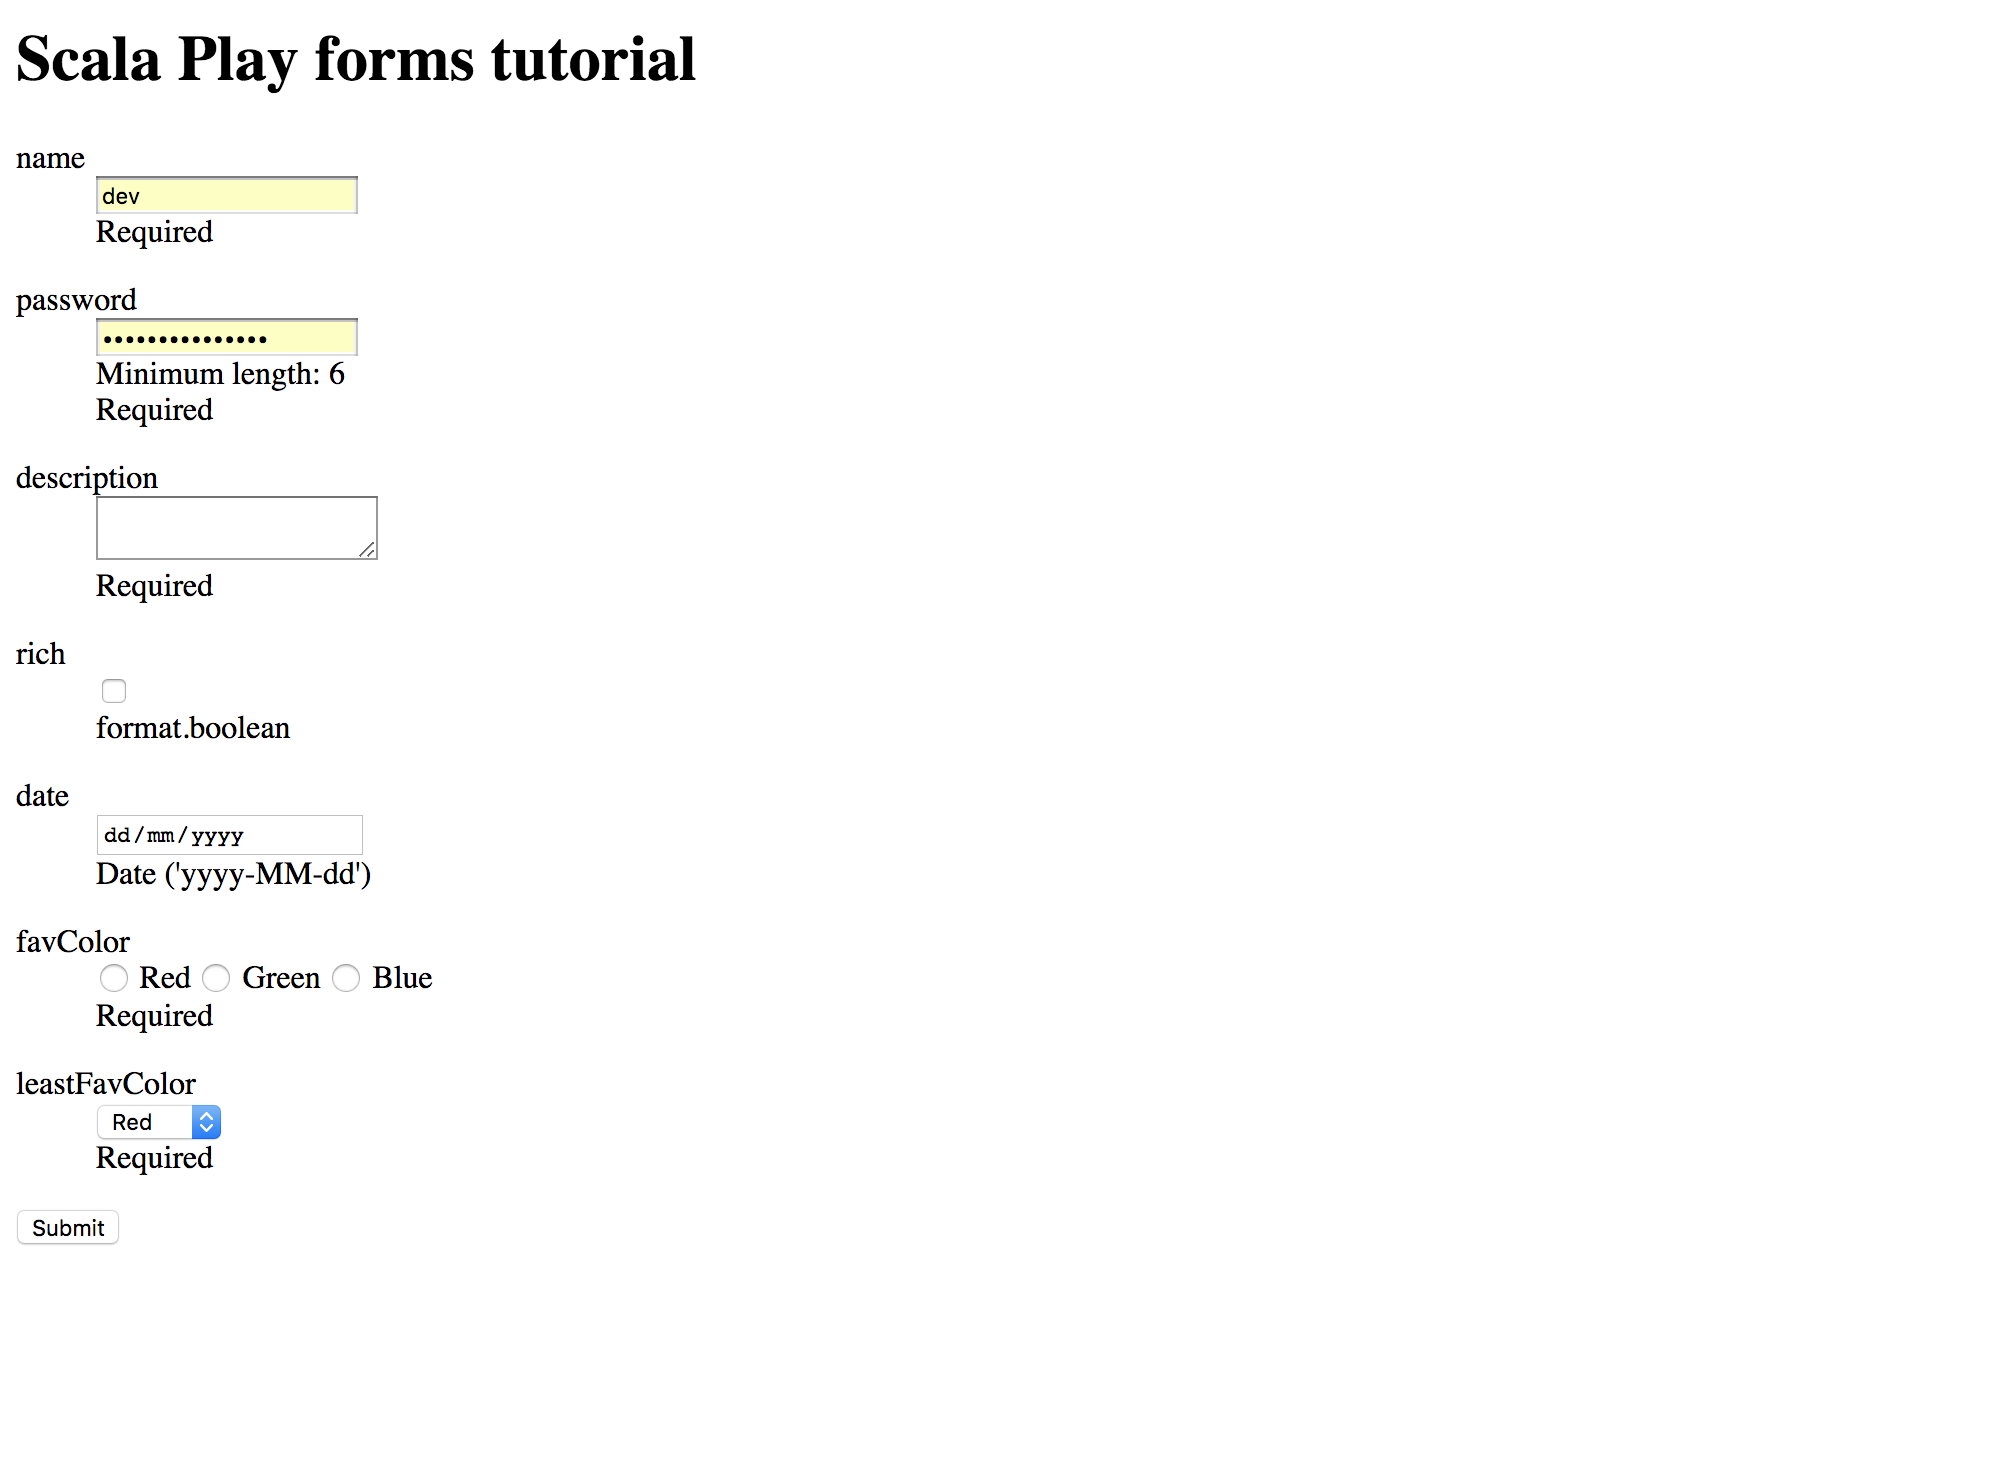
And how should we render our new form?
@import helper._

@(userForm: Form[InputTypesForm])(implicit messages: Messages)

@main("Scala Play forms tutorial") {
    <h1>Scala Play forms tutorial</h1>

    @form(action = routes.BasicController.inputTypesFormPost(), 'enctype -> "multipart/form-data") {
        @inputText(userForm("name"))
        @inputPassword(userForm("password"))
        @textarea(userForm("description"))
        @checkbox(userForm("rich"))
        @inputDate(userForm("date"))
        @inputRadioGroup(userForm("favColor"), InputTypesForm.Preferences.values.toSeq.map(pref => pref.toString -> pref.toString))
        @select(userForm("leastFavColor"), InputTypesForm.Preferences.values.toSeq.map(pref => pref.toString -> pref.toString))
        <input type="submit" value="Submit">
    }
}
The first few input types are used much like the input text we have been using until now. Of course each will render something slightly different:
- inputPassword will render a password field, whose contents are masked to the user
- textArea is a bigger text box
- checkbox renders a checkbox that will send a true value if checked, or false otherwise
- inputDate renders a nice date widget (take into account not all browsers support or render the same way)
But both radio buttons and select boxes need an extra set of options. Both input types are a way for the user to select 1 option among many, and that’s what you need to send as extra options: A sequence of options, each encoded as a tuple (value_to_send -> human_readable_label).
Finally, we reach to the input file. Unfortunately, forms with input files need a bit more work than the other input types. This means you can’t simply add a File to your case class and hope the mapping will do the hard work.
How can we make it work then? Let’s start by the form rendering this time:
@import helper._

@()(implicit messages: Messages)

@main("Scala Play forms tutorial") {
    <h1>Scala Play forms tutorial</h1>

    @form(action = routes.BasicController.fileFormPost(), 'enctype -> "multipart/form-data") {
        <input type="file" name="file">
        <input type="submit" value="Submit">
    }
}
As you can see, this time we did not use the Play helpers (@inputFile) to render the input. I can’t really find any usage for that helper (if you do, please let me know).
Also, as we will see, it is not possible to use the same mappings we used for the other input types, so the server logic is a bit different. Furthermore, note that we added an extra argument to define how should the form data be encoded: in order to send a file content through the form you must specify as multipart/form-data.
On the server side you should have:
def fileFormPost() = Action(parse.multipartFormData) { implicit request =>
  val fileOpt = request.body.file("file")
  fileOpt.fold {
    BadRequest("File not sent")
  } { file =>
    Ok(s"File received: ${file.ref}")
  }
}
Once again, we need extra logic to parse the file contents: this is done through the parse.multipartFormData parser implementation provided by Play. Now we can retrieve the file by name from the request body (you actually get a Temporary file with a reference for a java.io.File).
Now that you have a file, you can do whatever you need with it.
Useful resources
For most of the things, the Play documentation website has a pretty nice cover on using forms. There you can find many details not approached on this blog post.
Conclusion
This was the very basics of using HTML forms on Play framework. On the next part we will have a look on how to add a class other than primitive types to your form, how to do nested forms, how to protect your forms from some kind of attacks, and the most important: styling your forms!
If you found any problem following this tutorial, check the code at GitHub.
Now, have a look at the second part of this blog post:

